just ram

stuff I should remember

vim tip: !mkdir %:h

I just subscribed to Destroy All Software as well as the great content, I’m picking up lots of vim tips. I’m having to pause the video a lot, Gary is just too damn fast. Any way I’m going to start writing these vim gems down in the vain hope I’ll remember some of them.

Quickly creating a project structure

It’s possible to setup a new project without leaving vim. Lets create a new dir for a quick demo:

1
2
3
mkdir demo
cd demo
vim

From the vim command prompt we can create a new user model in the models dir using the vim command :n models/user.rb

Lets break this command down:

  • :n - n is short for new as in file
  • models/user.rb - the directory and name of our new file

This creates the new file in a vim buffer but when we go to write this file we get an error E212: Can't open file for writing, this is because the directory models does not exist.
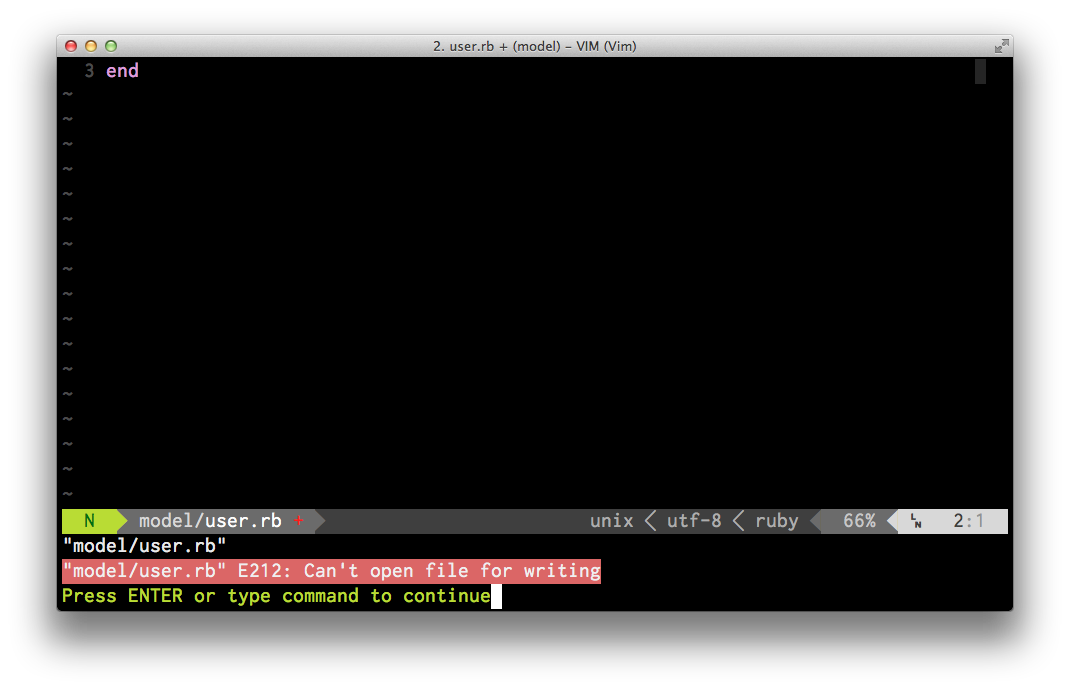
We can create this directory right from the vim command prompt with !mkdir %:h
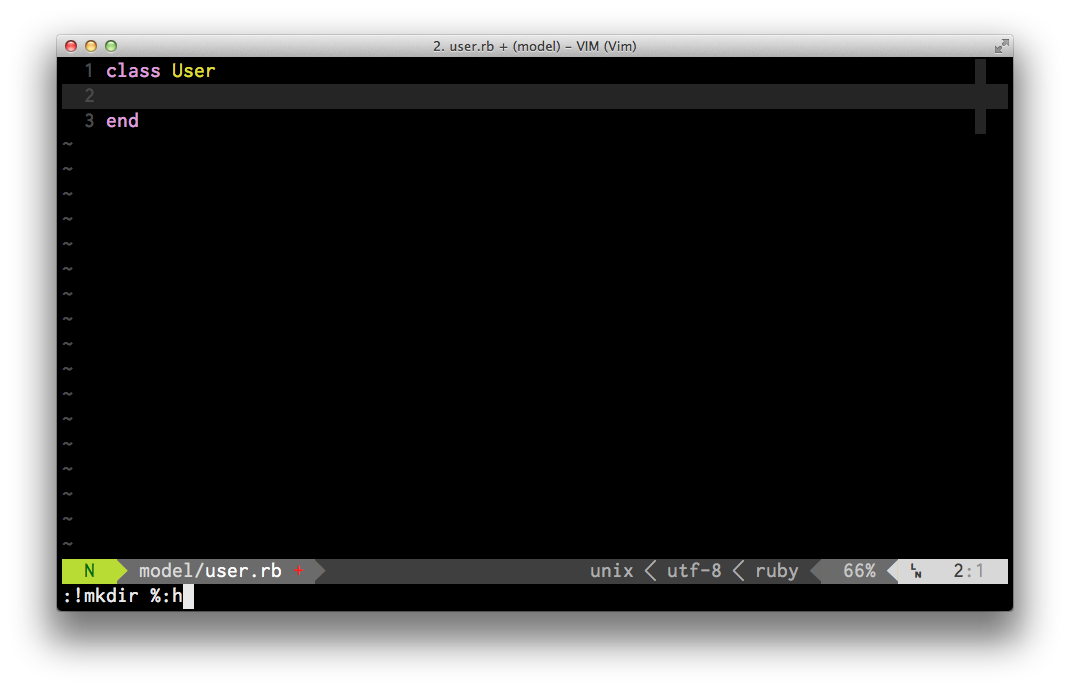
Now the directory has been created we can write the new file from vim.

So what does the cryptic command !mkdir %:h actually mean? Let break it down:

  • :! - Execute {command} with the shell
  • mkdir - Make a directory shell command
  • %:h - The directory of the current file (in our case models)

The full vim help text for %:h:

1
2
3
4
5
6
7
8
9
10
:h	Head of the file name (the last component and any separators
	removed).  Cannot be used with :e, :r or :t.
	Can be repeated to remove several components at the end.
	When the file name ends in a path separator, only the path
	separator is removed.  Thus ":p:h" on a directory name results
	on the directory name itself (without trailing slash).
	When the file name is an absolute path (starts with "/" for
	Unix; "x:\" for MS-DOS, WIN32, OS/2; "drive:" for Amiga), that
	part is not removed.  When there is no head (path is relative
	to current directory) the result is empty.

Deeper folder structure

You can create deeper folder structures using the same technique with one extra switch on the mkdir command.

1
2
3
:n specs/models/user_spec.rb
:!mkdir -p %:h
:w

The -p switch will create the intermediate directories for you. If you don’t use this switch the command will fail.

The full command line help for the mkdir -p switch:

1
2
3
4
5
6
-p	Create intermediate directories as required.  If this option is not
specified, the full path prefix of each operand must already exist.  On the
other hand, with this option specified, no error will be reported if a
directory given as an operand already exists.  Intermediate directories are
created with permission bits of rwxrwxrwx (0777) as modified by the current
umask, plus write and search permission for the owner.

I think that’s as much as I need to know about :!mkdir %:h for now.

Hello brave new world

Trying out Octopress

Octopress for the win!

Bloggin’ from vim, yay.

Updated the theme to darkstripes

Imported my old worpress posts using exitwp

Code

ruby, ruby, ruby
1
puts 'hello world!'

Images

### I’m Old Gregg!

Quotes

### Block quote

You ever drunk Baileys from a shoe?

Old Gregg The Mighty Boosh

Pull quote

Old Gregg’s anatomy a species classification is a topic of debate. Some say he’s half man half fish, others say it’s more of a 70/30 split.

Video

That pretty much covers everything I want to do with this blog so I think Octopress is a go, go, go!

My first Redcar plugin

As a small thank you to the Redcar team for such a great editor and in the spirit of giving a little bit back I’m documenting the process of creating my first plugin.

Introduction

I really like the idea of the Redcar editor. Its written in Ruby, its possible to write your own plugins what’s not to like? Though I must confess I don’t use it as my day to day editor, I wonder if writing my own plugins will change that.

Let see how easy it is to write a plugin for Redcar.

What’s da big idea

The idea for my first plugin is rather ambitious considering I’ve no idea how to write a plugin. I’d like to replicate some of the functionality of Live Reload - basically refresh a browser web page whenever I save a file in Redcar. This will save me constantly hitting refresh in the browser when working with Backbone.js.

I’m hoping to trap the save event of Redcar and call out to my browser (Chrome) and tell it to refresh the page.

Install Redcar

I first followed the install instructions:

http://github.com/redcar/redcar/wiki/installation

All good no problems there (I’m running on a Mac OSX 10.7.1)

Plugin Guides

I then read the plugin guides I found here:

Plugin.rb

Setting up a plugin is really easy and well described in the guides listed above. Redcar itself is made up of a bunch of plugin’s so there are no end of great examples to follow in the source code (http://github.com/redcar/redcar)

For trapping the save event I dug into the source code and came across the method project_refresh_task_type which is called on all plugins after a save. To hook into this process my plugin simply defines the method:

1
2
3
def self.project_refresh_task_type
  RefreshBrowser
end

This may not be the best place to hook into save, Redcar has the concept of events and that may be a better place to look but for now this is working.

Browser refresh script

RefreshBrowser is a Redcar::Task which I have created to run the browser refresh script.

I managed to find a script to refresh the browser here:

http://brettterpstra.com/watch-for-file-changes-and-refresh-your-browser-automatically/

The script uses a keyword to identify which tab to refresh in the browser so I needed this to be saved and configurable somewhere. Luckily Redcar has a storage mechanism built right in.

Storage

Redcar’s storage mechanism allows you to easily store configuration data into a yaml file.

1
2
3
4
5
def storage
  @storage ||= Plugin::Storage.new('live_reload_plugin')
  @storage.set_default('keyword', '')
  @storage
end

Here I am using this mechanism to store the ‘keyword’ used by the RefreshBrowser task. This allows the user to edit the yaml file via the Redcar plugin preferences. It’s also possible to setup a nice edit page but for now this will do.

Source

You can find the source for this plugin here:

http://github.com/justinramel/redcar_plugin_live_reload

Was it easy?

YES! The Redcar team have done a great job and made it incredibly easy to create your own plugins. In a couple of hours I made a useful plugin, useful to me at least. I’ve spent more time fussing over this blog post than developing the plugin.

So what you waiting for? Go give it a try!

Upload files to Sharepoint from linux

Fortress

It seemed almost impossible to penetrate the fortress that is Sharepoint with only NTLM authentication enabled. Turns out its really easy when you know how.

curl to the rescue!

You can upload files using curl directly into Sharepoint via it’s HTTP PUT interface.

curl --ntlm --user username:password --upload-file myfile.xls https://sharepointserver.com/sites/mysite/myfile.xls

Told you, easy when you know how.

Shibboleth settings for TorqueBox

Authentication Settings

Notes on setting up Shibboleth against an Apache Reverse Proxy to TorqueBox.

Config File: /etc/httpd/conf.d/shib.conf

ShibUseHeaders On AuthType shibboleth ShibRequestSetting requireSession 1 require valid-user

The ‘ShibUseHeaders On’ setting tells Shibboleth to pass along its attributes as request headers so your sinatra/rails application can gain access to them allowing you to implement your own authorisation system.

Simple Authorisation

If you don’t need a complex authorisation system and you don’t mind users seeing a standard Shibboleth authorisation error page:

You can implement this via your Shibboleth settings using the require statement:

ShibUseHeaders On AuthType shibboleth ShibRequestSetting requireSession 1 **require grouper_groups ~ MySecurityGroup**

Here we require the custom grouper_groups attribute matches on the regular expression after the ‘~’. Basically to access the protected url the user must be a member of the MySecurityGroup.

Top Tip

When playing with your Shib settings don’t forget to restart httpd to see the affect. sudo /sbin/service httpd restart

Setup Apache Reverse Proxy to Torquebox

Setup Apache as a Reverse Proxy in front of a standalone Torquebox server.

Apache Setup

Proxy Module

For this to work Apache must have the mod_proxy module loaded:

http://httpd.apache.org/docs/2.1/mod/mod_proxy.html

Config file: /etc/httpd/conf/httpd.conf

ProxyRequests Off # Switch off forward proxy ProxyPreserveHost On # Pass host name onto the proxy ProxyPass /myapp http://localhost:8080/myapp/ # Map url to remote server ProxyPassReverse /myapp http://localhost:8080/myapp/ # Adjust header sent from remote server to match url Here we are passing all calls to the /myapp/ url on to the Torquebox server http://localhost:8080/myapp/

TorqueBox Setup

In your Torquebox application folder create a file ‘config/torquebox.yml’ which contains a context which matches the Apache reverse proxy url.

torquebox.yml

web: context: /myapp ruby: version: 1.9

TorqueBox - gem install error

TorqueBox Install

I’m playing with latest version of TorqueBox (Currently 2.x.incremental.245) the easiest way to install it is via a gem:

gem install torquebox-server --pre --source http://torquebox.org/2x/builds/LATEST/gem-repo/

Full details on the TorqueBox blog (http://torquebox.org/news/2011/06/10/torquebox-gem/).

Error

Anyhoose when doing the gem install on my dev server (CentOS 5.6) I got the error:

Error: Your application used more memory than the safety cap of 500m. Specify -J-Xmx####m to increase it (#### = cap size in MB).

Fix

After a bit digging around it turns out you need to set the heap size when running the gem install:

jruby -J-Xmx900m -S gem install torquebox-server --pre --source http://torquebox.org/2x/builds/LATEST/gem-repo/

More details on stackoverflow.

Hope that helps someone or maybe me if have to do this again!

SETUP GIT REPO

ADDING KEY TO SERVER

scp ~/.ssh/id_rsa.pub git@myserver.com:~/.ssh/authorized_keys

SERVER

sudo mkdir /home/git/myrepo cd /home/git/myrepo sudo git --bare init sudo chown -R git:git /home/git/myrepo

CLIENT

`mkdir myrepo cd myrepo git init

add some files

git add . git commit -m “added some files”

git remote add origin git@myserver.com:myrepo git push origin master

rm -r myrepo/ git clone git@yourserver.com:myrepo `

Rails new app workflow

These are the steps I take when creating a new Rails app, documented here for when I forget.

Create app

rails new

cd

git

git init

git add .

git commit –m ‘Initial commit’

Remember: Rails generates a .gitignore file for us.

rvm and gemsets

rvm gemset create

echo ‘rvm use 1.9.2@’ >> .rvmrc

echo ‘.rvmrc’ » .gitignore

Creates a .rvmrc file in current directory that way when you cd into this directory rvm automatically switches to the correct version of ruby and the gemset we just created.

Change in and out of the directory to get rvm to kick in:

cd ..

cd

Gemfile

Edit ./Gemfile and add the following lines.

gem ‘haml’

group :test do

gem ‘rspec’

gem ‘rspec-rails’

end

Then install and run bundler:

gem install bundler

bundle install

rspec

Generate the rspec files:

rails g rspec:install

vim-ruby-refactoring - Extract Method

This post is part of a series which documents the vim-ruby-refactoring plugin.

IMPORTANT: As well as installing the vim-ruby-refactoring plugin, you must also install the matchit.vim plugin for this refactoring to work.

Extract Method

Extracts a selection into a method and places it above the current method.

The refactoring: http://www.refactoring.com/catalog/extractMethod.html

Example

Before refactoring:
ExtractMethod_Before
Visually select lines you wish to extract
Hit your **** then type **rem **You will now see a prompt to enter the new method name: Method name: print_details

After refactoring:
ExtractMethod_After
A new method print_details has been added above the print_owing method containing the contents of the selected lines.

rem is the default binding for this refactoring, think Refactor Extract Method.