This post is part of a series:
- Jenkins.NET
- Jenkins.NET Plugins
- Setup Jenkins.NET
- Setting up your first job
- Your first build
- Breaking the build
- Diagnosing and fixing a broken build
- Monitoring your build
- Running your tests
- Code Analysis
- Security
- Active Directory Security
After building your solution the next task you’ll want to automate is the running of your tests. Jenkins comes with a multitude of test plugins so whatever test framework you’re using chances are you’ll be covered. To show how easy it is to add tests to a build we’ll add NUnit to our demo solution and have Jenkins run the tests every time we commit a change to the source repository.
Test Project Structure
Structure of the demo project is:
Tools\NUnit\bin contains the NUnit framework and runner.
The DemoTest project references the nunit.framework.dll from this folder. This enables the solution to be checked out and run with out any pre-installation requirements. This work great for Jenkins but its also a great way to setup your solutions, if you need to move to a new machine or if you have a new starter you just check out the solution and its ready to build and run your tests.
Execute any test runner
The build step “Execute Windows batch command” works with any test runner that has a command line runner. We will use this method to run the NUnit command line test runner in the Demo project.
Use the Demo » Configure link to access the configuration page, under the Build section click the “Add build step” button.
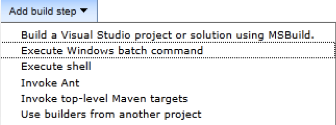
Select the “Execute Windows batch command” to add a new build step.
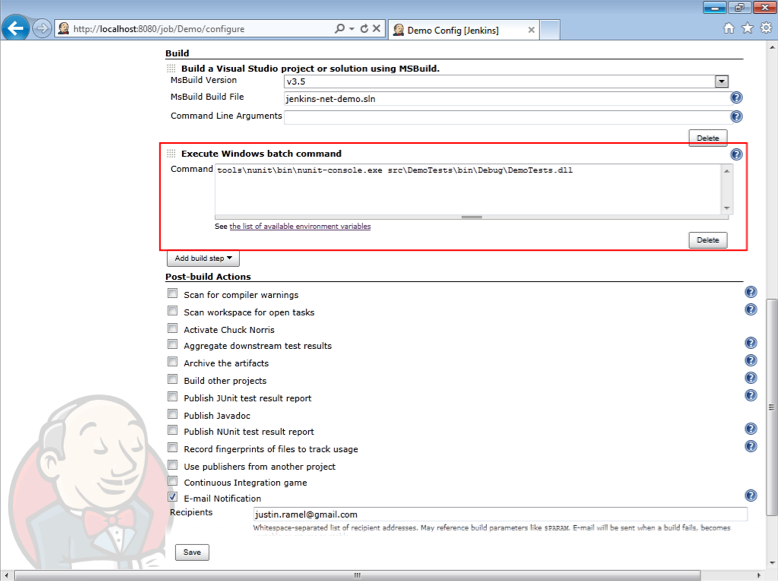
Under the “Execute Windows batch command” section enter the command:
-
Tools\nunit\bin\nunit-console.exe src\DemoTests\bin\Debug\DemoTests.dll
-
Click the “Save” button
This command is telling Jenkins the location of the NUnit test runner (Tools\nunit\bin\nunit-console.exe) and the location of the test DLL to run against (src\DemoTests\bin\Debug\DemoTests.dll).
This command will now execute the NUnit test runner after every solution build.
Failing Tests
When a test fails Jenkins will fail the build and show a red ball for the status of the project.
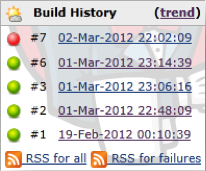
Now we know the build has failed but we don’t want to start digging through the console output to find the details of the failing test. Lets introduce another Jenkins plugin which will show details of exactly which test failed and why.
Plugin Setup
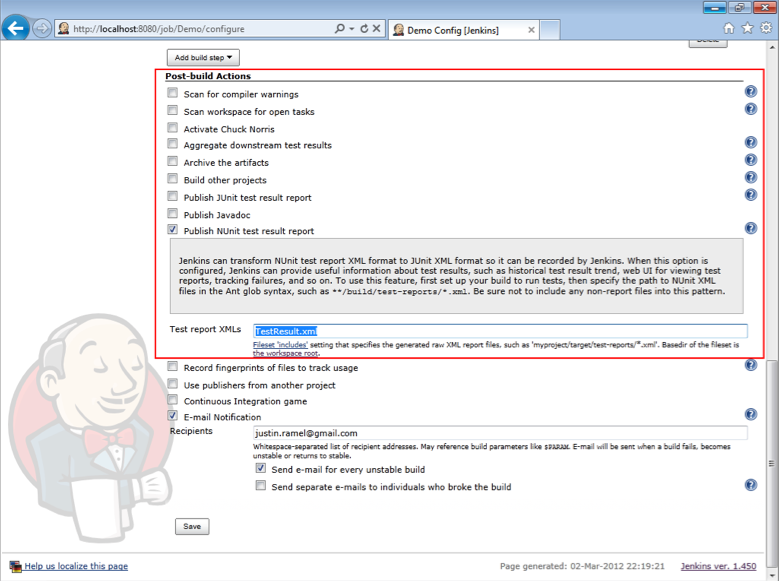
Use the Demo » Configure link to access the Demo jobs configuration page, under the Post-Build Actions section.
-
Tick the “Publish NUnit test result report” check box.
-
Enter the output of the NUnit test runner: TestResult.xml
-
Click the “Save” button.
Run a build again to see the NUnit test report.
- Click the Demo » Build Now link.
Of course the build has failed again but that’s what we want. This allows us to see NUnit test report. To view the report click on the failed build in the Build History.
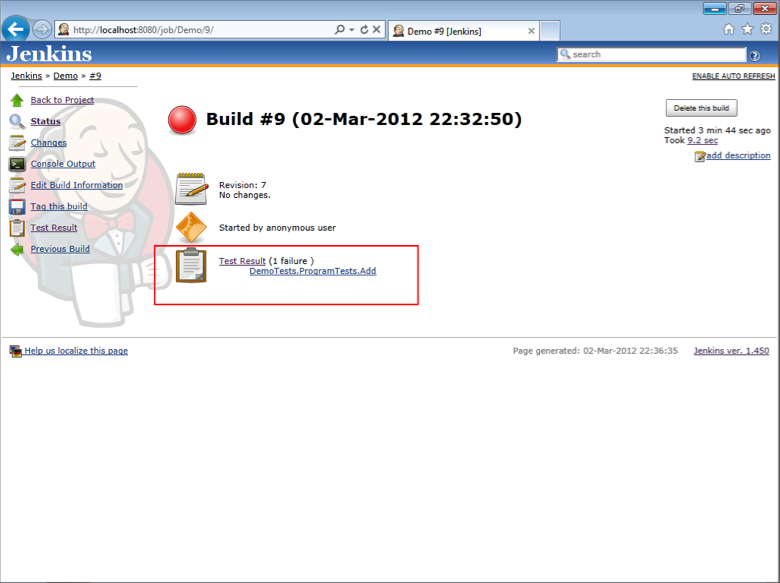
We now have a Test Result area that is showing 1 failure in the DemoTests.ProgramTests.Add namespace. That’s certainly easier than digging through the console output. The benefits don’t end there, if you click on the Test Result link we will get a more detailed report.
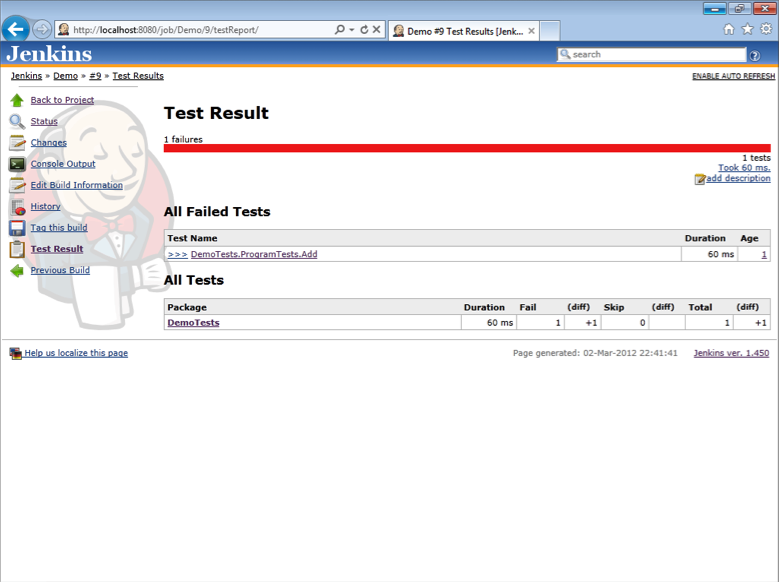
Here we get a pretty report showing the full details of the failure. We can drill down for even more detail using the link DemoTests.ProgramTests.Add.
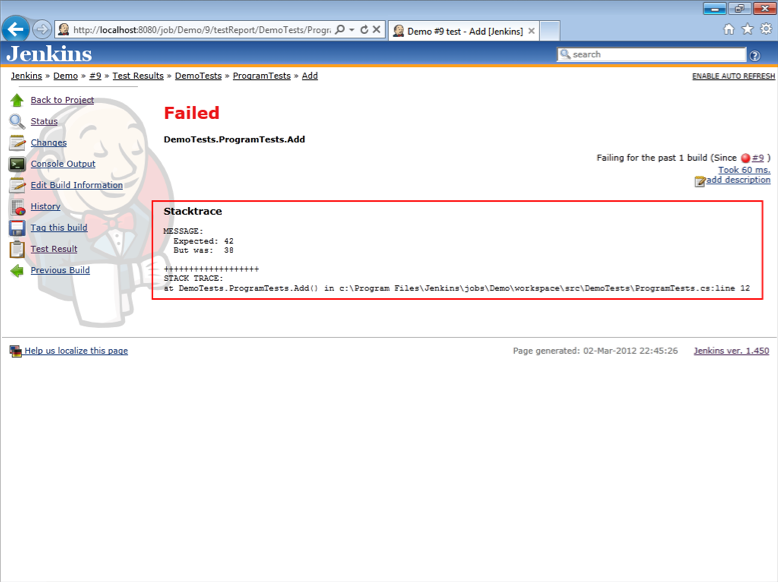
This gives the error message from the test, a stack trace, the filename of the failing test and even the line number. You can’t ask for much more than that but there is one more benefit we can eke out of our test runner and that is our test history.
Test History
Once you setup the Unit plugin, Jenkins will track all your test results. This is a great way to keep an eye on the general health of your project. I’ve added a few more tests and commits to the demo project to show how the test history works.
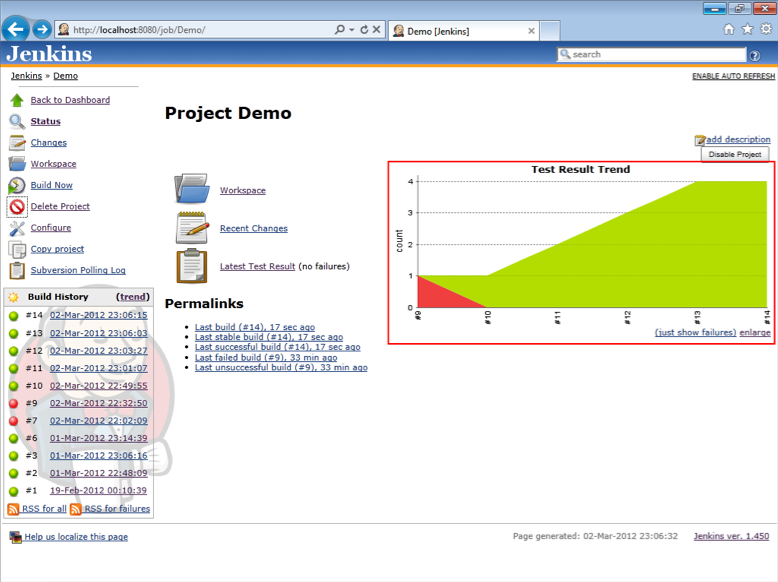
As you can see the Demo home page now has a “Test Result Trend” graph showing the initial failing test, followed by anther commit to fix the failure then another 4 tests that were added. The graph shows at a glance that our Demo project is getting healthier on every commit. This is the type of graph we want to see in our projects.