This post is part of a series:
- Jenkins.NET
- Jenkins.NET Plugins
- Setup Jenkins.NET
- Setting up your first job
- Your first build
- Breaking the build
- Diagnosing and fixing a broken build
- Monitoring your build
- Running your tests
- Code Analysis
- Security
- Active Directory Security
If you happen to be running Active Directory within your organization you can have Jenkins utilize it for authentication. This will save you and your team from having to remember yet another password when connecting to Jenkins.
Install the Active Directory Plugin via Jenkins » Manage Jenkins » Manage Plugins
Configuration

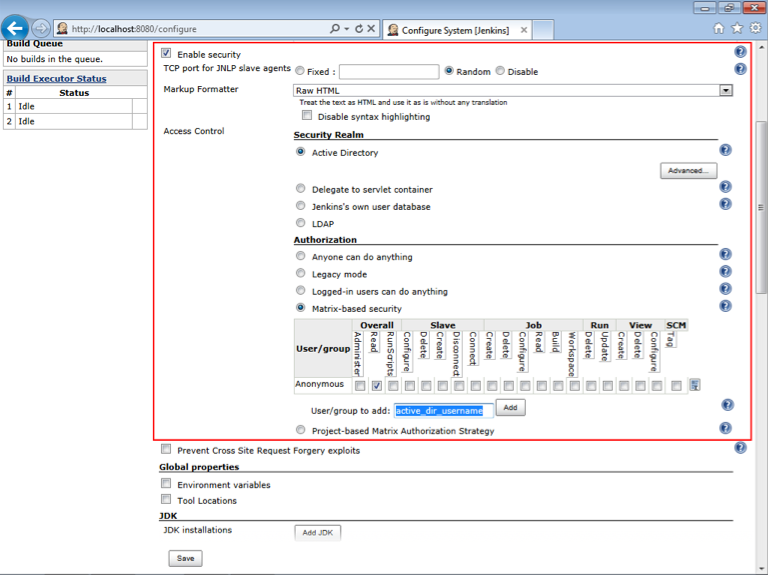
Tick the “Enable security” check box to open up the security area.
Access Control

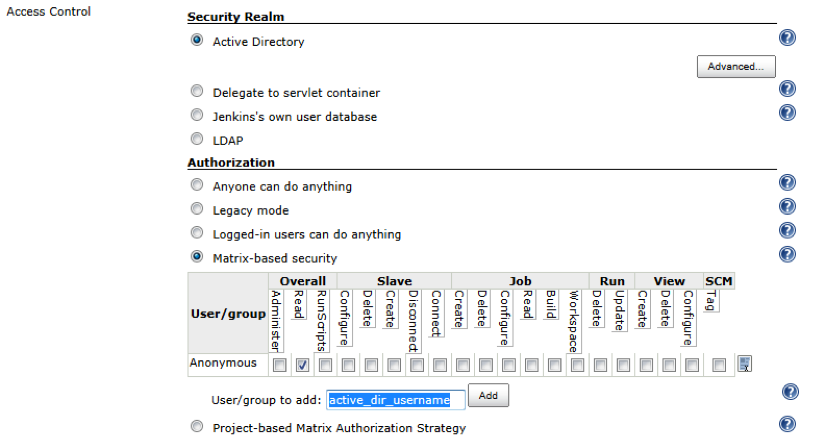
Under the Access Control - Security Realm section select the “Active Directory” radio button.
Authorization

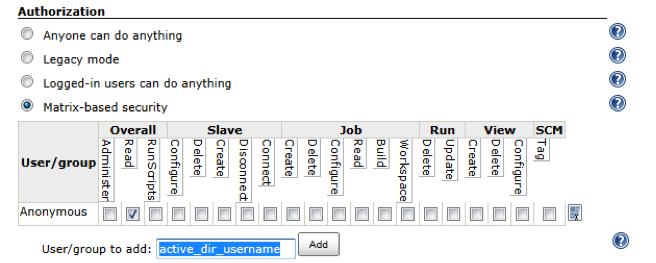
Under the Authorization section select the “Matrix-based security” radio button.
This option will give you the most flexibility over the security for Jenkins. I usually give Anonymous users Read access that allows me to share the build information with managers and stake holders if they are interested. As I trust my fellow developers I will usually give them Administrator access on the server. Of course you are free to setup whatever security Matrix you like, you can even take this as far as a project-based matrix.
- Enter your Active Directory username in the “User/group to add” text box.
NOTE: Usernames are case sensitive! Kindly pointed out by bartensud, read his comments below for more details.
- Click the “Add” button.
- Tick the Administer check box in the Overall area of the matrix.
- Finally click the “Save” button.
You have just given administrator access to this user, and they will be able to login to Jenkins using their Active Directory password.
Trouble shooting
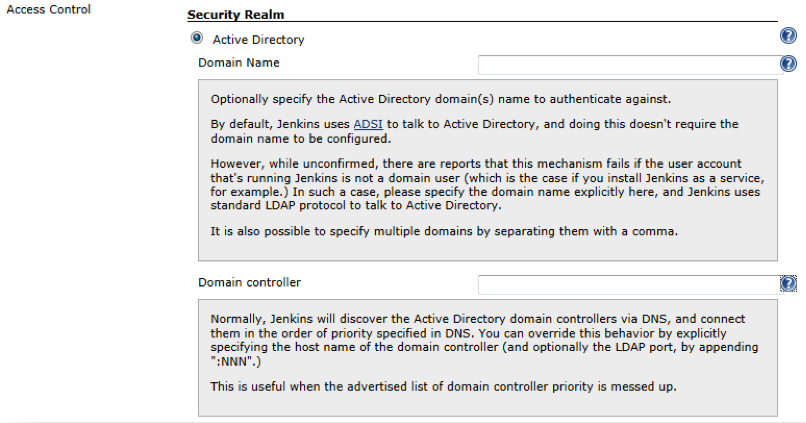
If you find Jenkins is not connecting to your Active Directory controller, try setting the advanced settings for the Active Directory plugin.

Click the “Advanced…” button. To reveal the area where you can specify the full details of your Active Directory Domain and Server.

Start by setting the Domain Name of your Active Directory and clicking the “Save” button. Now retry your Active Directory access.
This worked first time for me but if your not so lucky, try the same process again with the Active Directory Domain controller setting.