This post is part of a series:
- Jenkins.NET
- Jenkins.NET Plugins
- Setup Jenkins.NET
- Setting up your first job
- Your first build
- Breaking the build
- Diagnosing and fixing a broken build
- Monitoring your build
- Running your tests
- Code Analysis
- Security
- Active Directory Security
In Jenkins the definition of a build process is called a Job. Jobs are created using the main menu on the Jenkins home page. We’ll create a basic Job that will checkout our source and build the solution.
From the main Jenkins menu, Click the ‘New Job’ link.
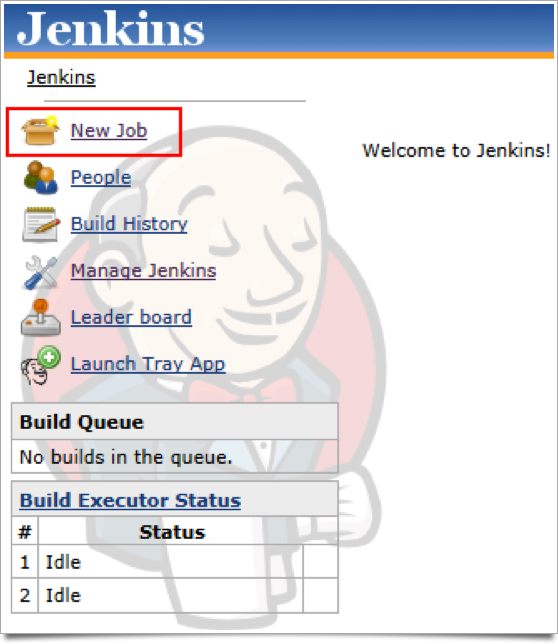
You now see the New Job configuration page.
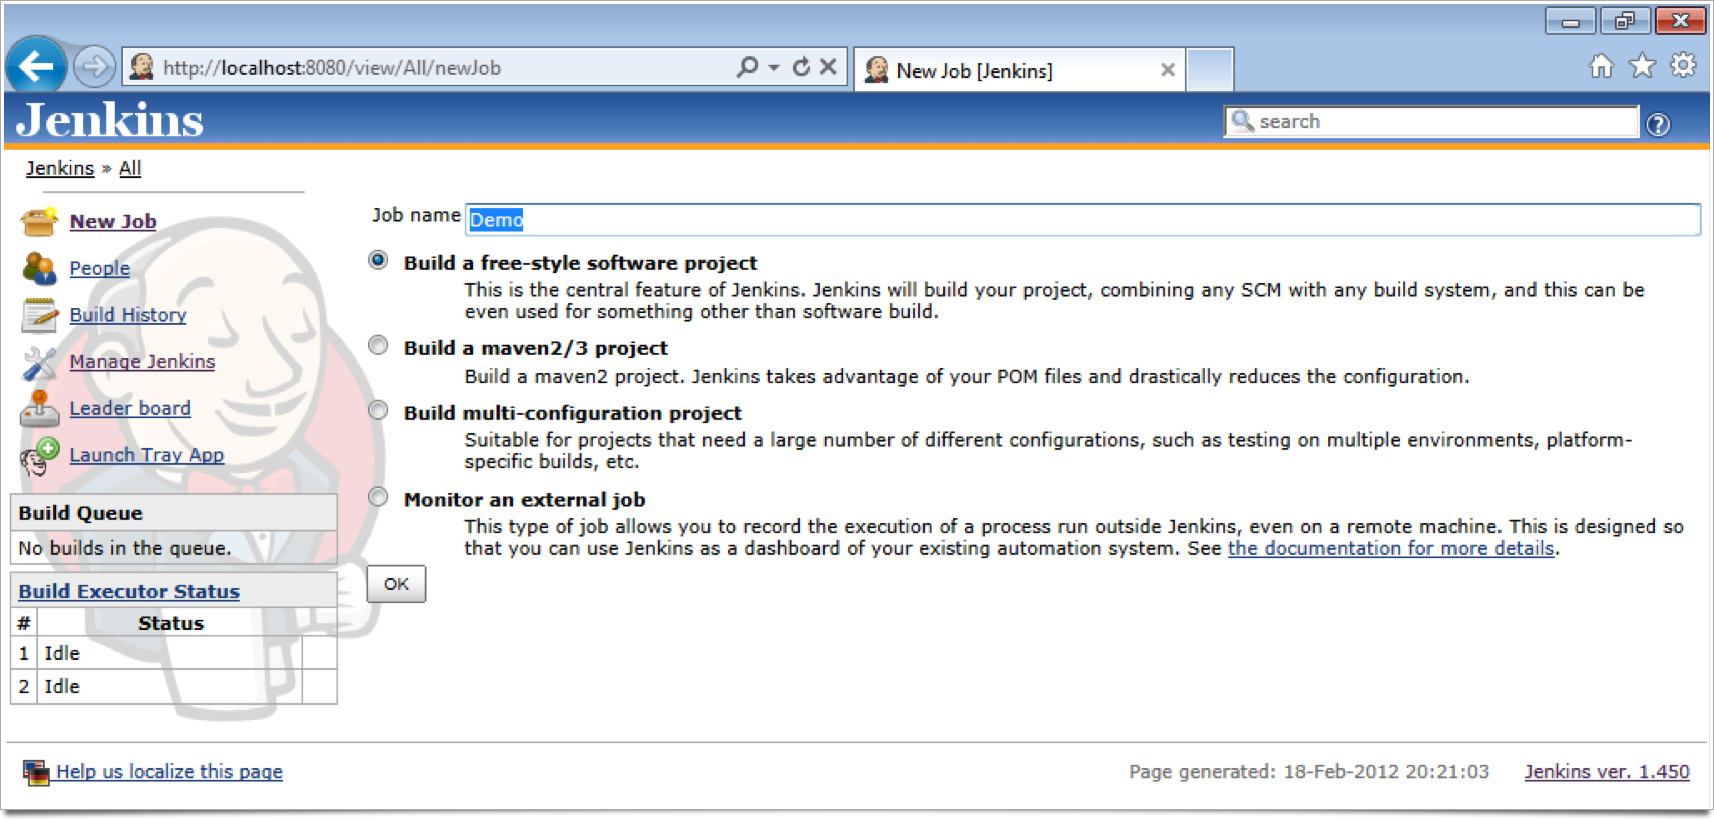
- Set Job name to Demo.
- Select the ‘Build a free-style software project’ radio button.
- Click the ‘OK’ button.
Jenkins will now create the Job workspace on disk and redirect you to the job configuration page.
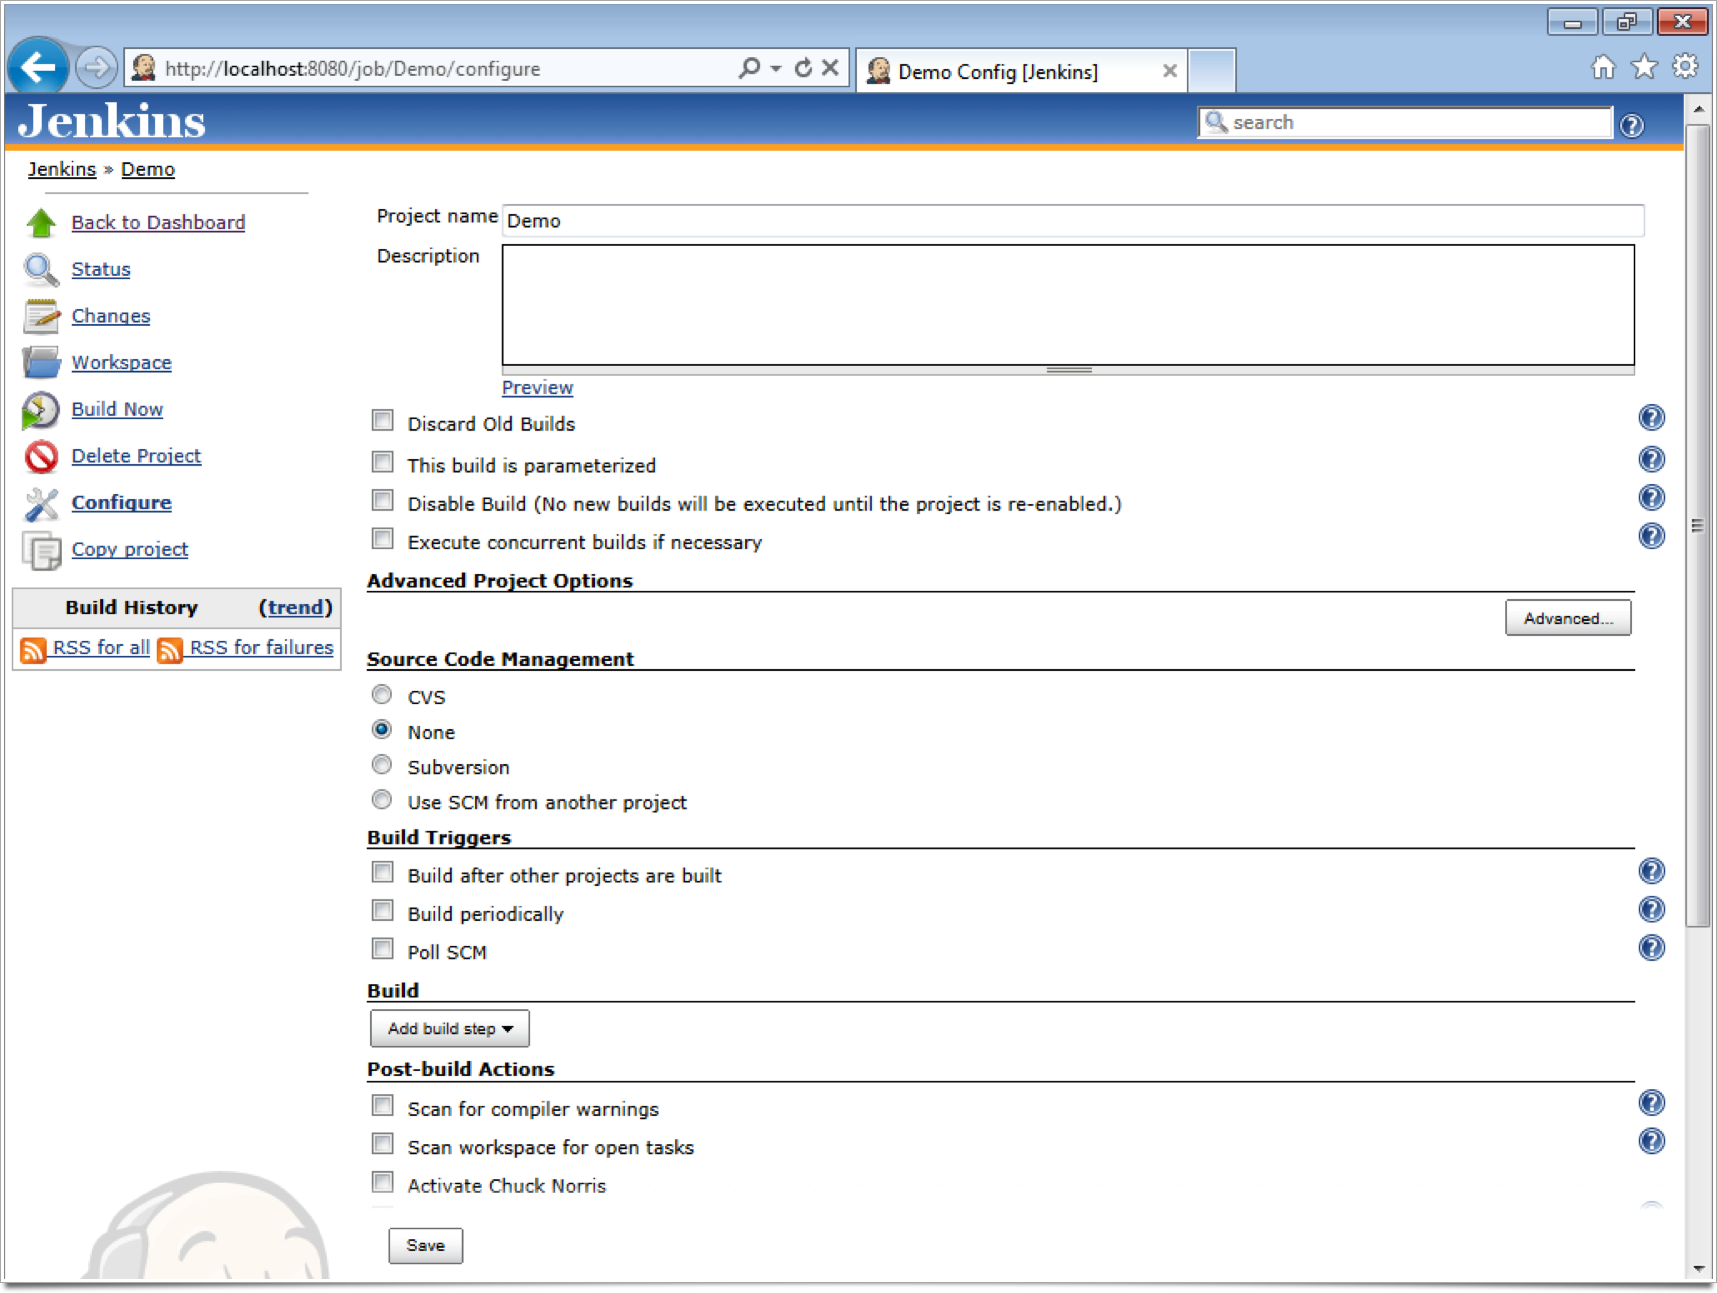
Next we’re going to checkout our solution from source control and build it. So we first need to give Jenkins details of our source control server.
Source Control
For the purpose of this demo we’ll use Subversion, mainly because this is the source control management software I use day to day. Subversion is a very popular open source choice for .NET.
Jenkins supports Subversion right out of the box but it also has support for all the major source control management systems. For example here are few which are popular for use with the .NET framework:
- Team Foundation Server Plugin - This plugin integrates Microsoft Team Foundation Server source control to Jenkins.
- Mercurial Plugin - This plugin integrates the Mercurial version control system with Jenkins.
- Git Plugin - This plugin allows use of Git as a build SCM. Git 1.3.3 or newer is required.
- Visual SourceSafe Plugin - This plugin integrates Jenkins with Microsoft Visual SourceSafe.
Visual SourceSafe, seriously? Maybe you’re being forced to use it at gunpoint? If not do yourself a favour and check out Subversion. VisualSVNServer is a very easy to install, administer and use on Windows best of all its free! There is also a great Subversion Plugin VisualSVN for Visual Studio that I highly recommend.
I have created a Subversion repository on GoogleCode that we’ll use to demo the build process from Jenkins. Lets setup our Job to grab the source code from this repository. This is done in the Source Code Management section of the configuration page.
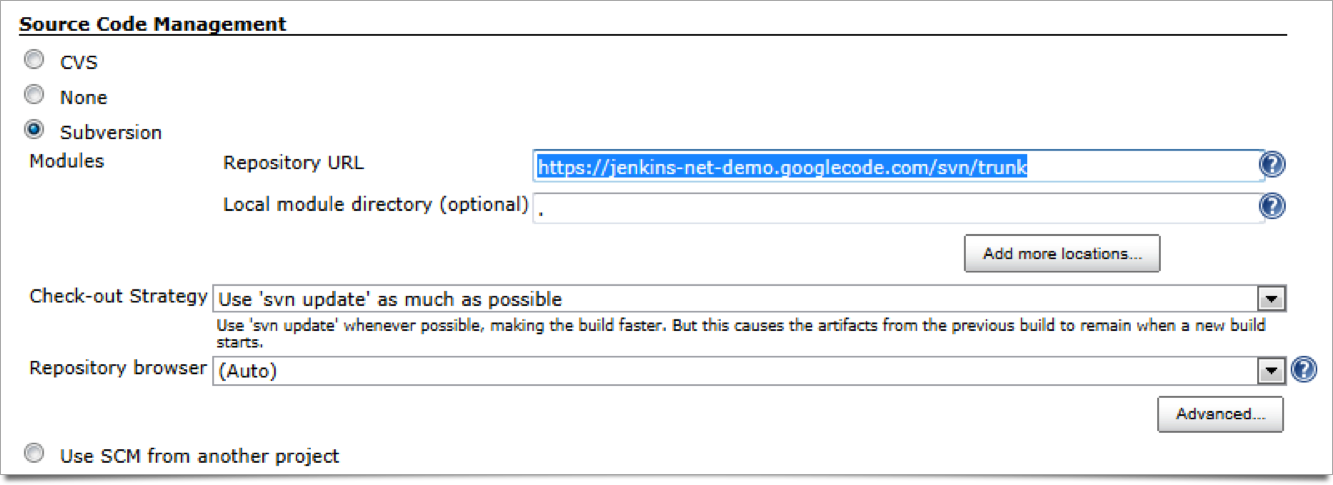
- Select the Subversion radio button.
- Set the Repository URL to: https://jenkins-net-demo.googlecode.com/svn/trunk
Subversion Authentication
Unlike the demo repository used here, it’s more likely your source code repository requires authentication (if it doesn’t, you may want to think about securing it). If your repository does require authentication Jenkins will display and error message and ask for you to supply login credentials.

Click the “enter credential” link. You will now be shown the Subversion Authentication page.
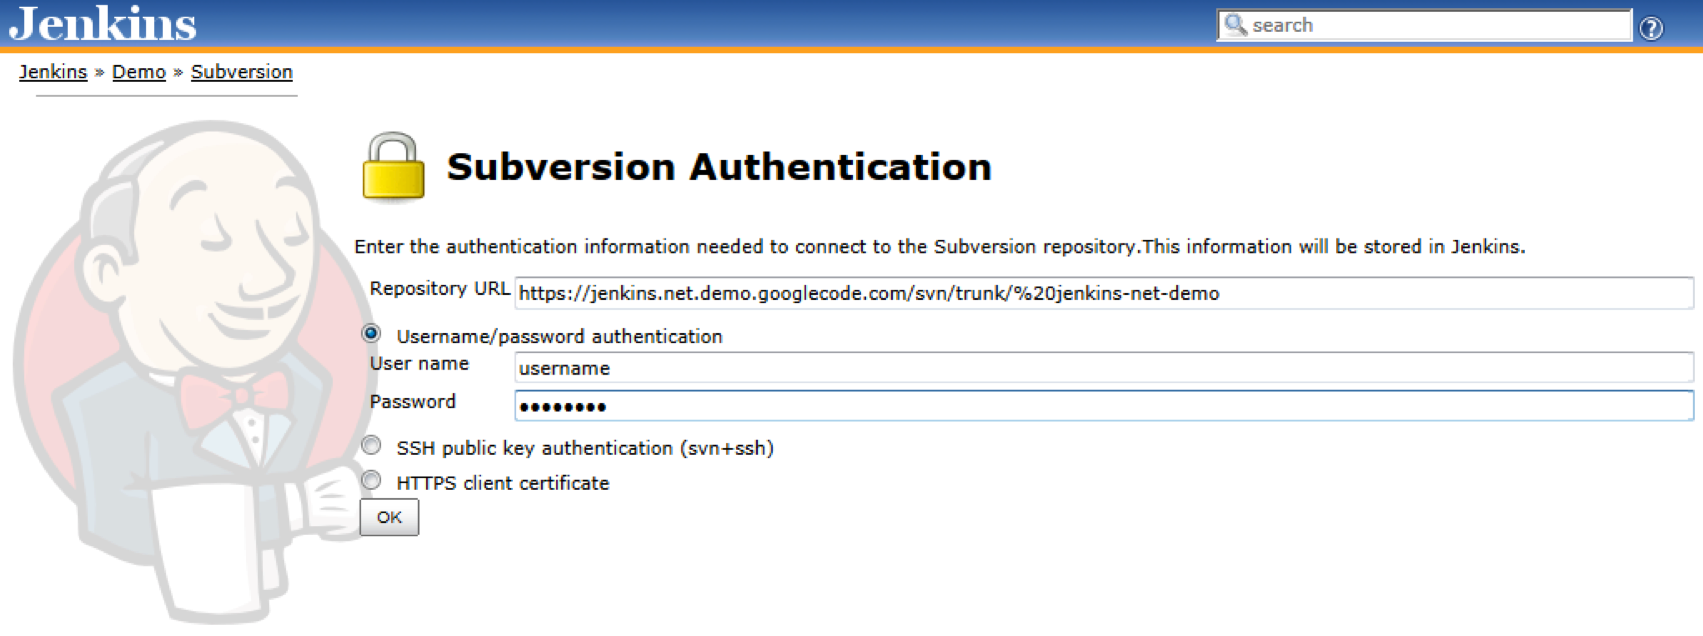
Enter your authentication details and then click the “OK” button.
Subversion is now configured and we can move onto Build Triggers.
Build Triggers
We want to trigger a build every time our source code changes; we achieve this by creating a “Build Trigger” which polls our source code repository. When a change is detected a new build is triggered.
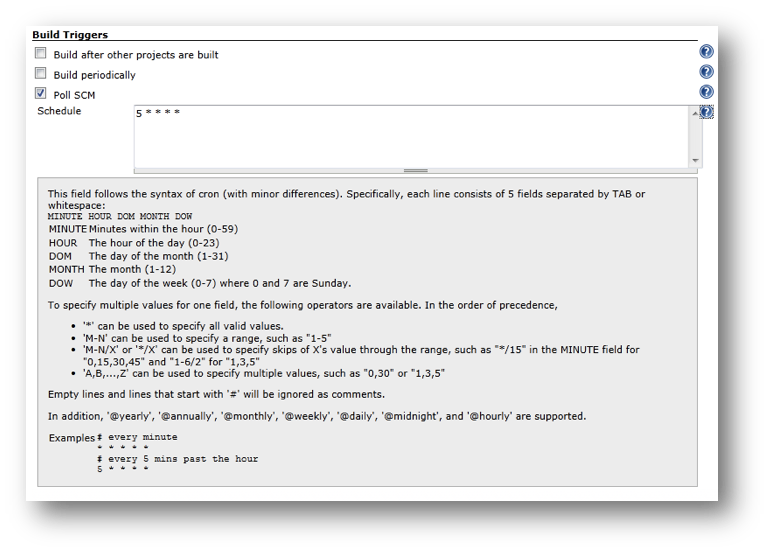
- Under the Build Triggers section, tick the Poll SCM checkbox.
- Enter “5 * * * *” in the Schedule text area, this translates to check for changes every 5 minutes.
As you can see from the help (which is available by clicking the
 icon) we can be extremely flexible
in how often we check the source code repository for changes. Checking every 5
minutes is my default as I tend make lots of small commits and I want to know
quickly if I’ve introduced a problem.
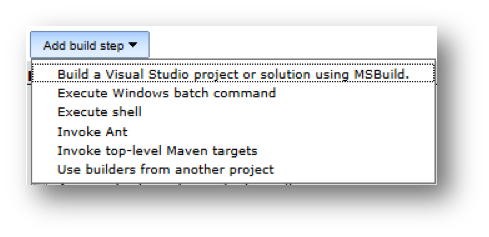
Finally we just need to tell Jenkins how to build the solution when changes are detected. This is done via the “Add build step” button under the Build section.
-
Click the “Add build step” button and select “Build a Visual Studio project or solution using MSBuild”.
-
This adds a “Build a Visual Studio project or solution using MSBuild.” area under the Build section.

- Set “MsBuild Version” to V3.5 (The version we setup previously)
- Set “MsBuild Build File” to the name of the demo solution: Jenkins-net-demo.sln
- Click the “Save” button and you’ll be redirected to the Demo project page
Congratulations your first Jenkins Job is setup.
In my next post we’ll build it!